I used to buy every tackle kit on the shelf. You know the ones — big boxes stamped “200 Pieces!” with colorful windows showing a rainbow assortment of lures, hooks, sinkers, and things I still don’t know the names of. I bought at least five of them over two years. Each box promised it would catch everything from catfish to striped bass. None of them did.
When I finally dumped one open on my garage floor and took inventory — all the pieces from all five kits, laid out side by side — something struck me. Out of maybe 1,000 individual items across those boxes, fewer than forty were things I’d actually use on a fishing trip. Forty out of a thousand.
The rest was either junk, duplicates of stuff I already had, or items designed for fish that don’t swim in North American waters.
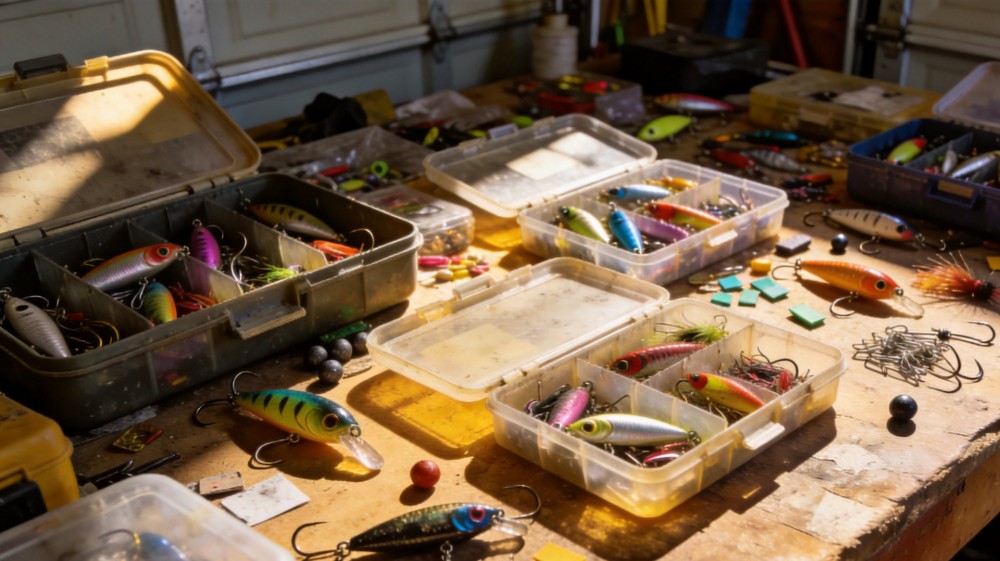
And here’s the thing — that wasn’t a problem with me being a bad fisherman. It was a problem with how tackle kits are designed to sell.
They pack those boxes with cheap filler so the sticker says “200 pieces” and looks like a good deal. But most of those pieces are useless to you unless you’re fishing in conditions you’ve never been in for fish you’ve never seen. It’s a trick. And if you’re starting out, it’s easy to fall for it because you can’t tell the difference yet between what’s useful and what’s decoration.
I could only tell after years of wearing them down or throwing them away.
So let me save you that time. Here’s what you actually need in a tackle box — not a list of everything you might someday need, but everything you need to start catching fish this weekend.
The Core List (Fewer Items Than You Think)
This is the setup I wish someone had handed me when I was fifteen and standing in a Bass Pro Shops aisle staring at fifty different packages, overwhelmed and spending too much money on things I didn’t understand.
Bring this instead:
Hooks (Three Types, Twelve Pieces Total)
Offset worm hooks — size 3/0 or 4/0 — four pieces. These are your bread and butter. You’ll put a soft plastic worm on them, rig them Texas-style or shaky-head style, and they’ll work in almost any freshwater situation. If you could only keep three types of hooks in your entire life, these should be one of them.
J-hooks — size 6 or 8 — three pieces. Simple, classic, versatile. Put a minnow or leech on one and drop it under a float near a dock. Works on bluegill, crappie, catfish, even largemouth bass in the right season. Cheap enough that you lose them without caring.
Drop-shot hooks — size 2 — two pieces. Drop-shotting is one of the most effective techniques for pressure-fed lakes, and a drop-shot hook has a unique eyelet that lets you tie on above the weight instead of below it. Two hooks, one technique that will make you feel like a pro who knows something nobody else does.
Don’t buy hook variety packs. They always give you five of each kind and none of the ones you actually need. Buy specific sizes in bulk — a bag of twenty offset worm hooks costs about eight dollars and will last you a year of regular fishing.
Line (Two Spools)
Four-pound test monofilament — one spool (150 yards). This is your go-to line for light tackle and finesse presentations. It’s sensitive enough that you’ll feel the subtlest nibbles but strong enough to land fish up to five pounds without worry. Casts far, stretches a little (forgiving for beginners), and costs less than a cup of coffee.
Six to eight-pound test monofilament — one spool (150 yards). Heavier version of the same thing. Use this when you’re targeting bigger fish, fishing around structure, or just want something less likely to break when you snag a tree. Also works as a fluorocarbon leader material later on.
Skip the braided line for now. It’s fantastic once you know what you’re doing, but it shows every flaw in your knot-tying, snags on debris, and costs six times more. Four-pound mono taught my wrists patience.
Soft Plastics (Five Types, Small Quantities)
You don’t need thirty colors. You need five types that cover the basics:
Green pumpkin worm with black flake — twenty pieces. Your primary lure. Works in clear water, murky water, warm water, cold water. Green pumpkin mimics crawfish and baitfish; the black flakes add flash in stained water. This single color and shape combination will probably account for sixty percent of your catches in year one.
Black/blue creature bait — ten pieces. For heavier cover — rocky areas, submerged brush, dense weed beds where worms get eaten too fast. Chunkier profile, more vibration, built to survive contact with structure.
Yellow/orange tube bait — ten pieces. Tube imitates small shrimp or minnows. Works surprisingly well when nothing else does. Keep some in your box simply because they’ll pop up as the answer on days when everything else fails.
Minnow-shaped paddle tail swimbait — eight pieces. This is your moving-lure option. Retrieve with a steady roll, pause, retrieve again. Attracts predatory fish that wouldn’t chase a stationary worm. The paddle tail creates realistic swimming motion even on slow retrieves.
Crappie jelly tube — ten pieces. Smaller profile (two inches or less). For panfish and smaller bass in shallower water. Cheap enough that losing them to weeds doesn’t hurt.
No more colors at this stage. You learn to read water before you learn what “chartreuse” means in a practical sense. Pick one palette and stick with it. Add colors only when you understand why you’re adding them.
Terminal Tackle (Sinkers, Swivels, Weights)
Bullet weights (1/4 oz and 3/8 oz) — ten total. For Texas rigging those soft plastic worms. The lighter weight handles shallow presentation; the heavier drops faster through weed lines. Both are essential depending on water depth and current.
Drop shot weights (1/4 oz teardrop) — five total. Specifically designed for the drop-shot technique mentioned above. Teardrop shape runs clean over the bottom without catching on rocks or wood.
Quick-change swivels (size 4 and 6) — ten total. Connect lure to line, reduce tangles. Cheap, forgettable, necessary.
Split shot sinkers (assorted) — one small pack. Cinch onto line for quick weight adjustments. Not pretty but infinitely useful when you need to add half an ounce somewhere.
That’s it. No fancy jigs, no crankbaits, no spinnerbaits, no frogs, no flukes, no whistling buzzbaits shaped like dinosaurs. Five types of soft plastics, three types of hooks, two spools of line, and basic terminal tackle. Maybe two hundred individual pieces total. That covers more situations than you’d believe.
What to Leave Out (At Least for the First Year)
Now here’s where most beginners go wrong — or rather, where I went wrong.
They walk into a store and buy the exciting stuff first. The bright yellow topwater frog that makes a booming sound when you cast it. The jointed crankbait with three treble hooks that looks like it costs more than my first car payment. The chartreuse crawdad with glow-in-the-dark eyes.
All of those things are real tools, and they’re real fun, but they’re also advanced. They require knowledge you haven’t developed yet about water temperature, seasonal migration patterns, prey availability, and retrieval speed relative to fish activity level. Throw a topwater frog into deep water in January and it catches exactly nothing except maybe some very confused carp.
Save the fancy lures for later. Start with what’s boring. Start with what works.
The worm hook + green pumpkin worm + bullet weight combo is boring. It looks like something a teenager makes his dad buy him against his will. It catches bass, walleye, crappie, catfish, and sunfish in practically every freshwater body in the continental United States. That’s not exciting, but it’s honest.
And honestly beats excitement every time you want to go home with fish instead of stories about the one that got away.
How to Organize What You Have
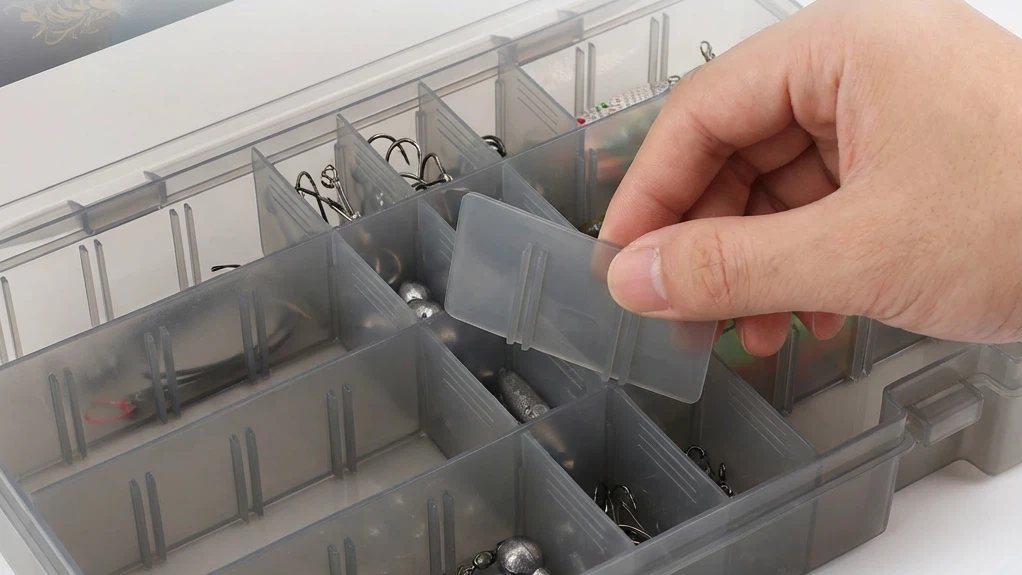
A tackle box that works starts with organization that matches how you think. Most starter boxes come with removable trays and compartments that are completely arbitrary — they’re sized for whatever the manufacturer thought would look nice on the shelf, not for how you actually use your gear.
Here’s how I’d sort mine if I were sitting down tonight and setting it up for tomorrow morning:
Separate hooks from everything else. Store them in their original packaging until you transfer them to the box. Hooks tangle with hooks, period. Keep them apart.
Line sits on top, easily accessible. Don’t bury your spools under layers of plastic trays. Pull the box open and you should see both line spools within two seconds. If they’re not reachable, you won’t change line when it gets worn down, and that’s a mistake.
Soft plastics grouped by type, not color. A green pumpkin worm next to a black-blue creature bait — not alphabetically sorted by shade of green. You grab based on tactic, not color preference.
Sinkers and split shots go in a dedicated corner. Small metal pieces scatter and disappear if the compartment isn’t closed tight. Use rubber bands or ziplock bags inside the box to corral them.
Simple. Functional. Doesn’t take longer than thirty minutes to set up properly.
A Word About Replacing Things
Your gear will get lost. Hooks will bend. Lines will fray. Soft plastics will tear on fish teeth or tree roots. This is normal and expected. It means you’re using them correctly.
My advice on replacement:
Check hooks before every trip. Run a thumbnail lightly across the point. If it catches, the hook is sharp. If it slides off smooth, replace it. Do not fish on dull hooks. I learned this the hard way on a tournament morning when I lost three solid largemouth because I hadn’t changed my hooks since the previous week. Three fish, gone. Just because the hook looked fine from distance. But up close, the point was rolled over from use.
Replace line every spring and every fall. Monofilament absorbs water over time, which weakens its tensile strength. You won’t notice the degradation day by day, but a six-month-old spool that’s been sitting in a hot truck is significantly weaker than a new one. Change it twice a year. Ten dollars each time prevents twenty-dollar surprises.
Let soft plastics go until they’re truly torn. A worm that’s been bitten once or twice still works. Only throw out what no longer moves naturally through the water.
And if you’re wondering how often you should replenish after buying this starter kit:
Offset worm hooks last about two months for a casual angler fishing weekends once or twice.
Monofilament lasts a full year with twice-a-year changes.
Green pumpkin worms wear out after forty to sixty fish depending on how much structure you fish through.
You’re looking at maybe fifteen dollars per year in replacements. For the entire time you’re actively fishing. That’s not expensive hobby, especially compared to the two-hundred-dollar kits you bought before realizing what was actually useful.
One Last Thing
There’s a moment — usually about the third or fourth time you walk into a sporting goods store feeling that specific mixture of confidence and confusion — when you realize that the guy behind the counter has been doing this for thirty years and knows more about fish in his fingertips than you do about fish in your entire head.
He’ll ask you what you’re fishing for. You’ll say “bass.” He’ll nod and reach under the counter for something he’s sold to thousands of people since you weren’t born. You’ll thank him, buy it, go home, try it on Saturday morning, and have the best day of your young fishing life.
That’s not luck. That’s a lifeline thrown by someone who already made the mistakes you’re about to make.
My job, right now, is to be that lifeline for you — without making you feel like you needed saving.
Because the truth is, building a simple tackle box that actually works doesn’t make you a beginner forever. It makes you efficient. There’s a difference. A beginner buys random junk and hopes for results. An efficient angler uses the minimum viable setup that gets consistent outcomes.
One day you’ll graduate past the basics. You’ll add crankbaits for spring, topwater for summer evenings, and jigs for cold-water winter bass. Those additions will come naturally once you understand why you’re adding them — not because the guy behind the counter told you they were cool.
Until then, start simple. Start smart. And stop buying those two-hundred-piece kits.
The water will reward you for it.
If you found this helpful, share it with someone who’s about to spend $75 at Academy Sports and walk away with more plastic junk than they know what to do with. Tell them to read this page first.